Browsing Tag

bathroom makeover

how-to-install-a-bathroom-vanity-in-8-steps

There are plenty of reasons to install a new bathroom vanity. A new vanity can provide more storage or counter space, change the look of the bathroom, and make it easier for residents to get ready for their days. Plus, for handy homeowners with all the right tools and experience, installing a bathroom vanity is a relatively simple one-day project that can be completed in just eight steps.

1. Measure Twice

Whether homeowners are remodeling existing bathrooms or adding new ones, the best place to start is obtaining accurate measurements. As with all home improvement projects, accurate measurements are absolutely essential.

2. Choose a New Vanity

There are numerous vanity types to choose from, so it’s easy for homeowners to find themselves feeling overwhelmed. When shopping for a new vanity, it’s best to focus on the counter and storage space. Hardware such as faucets and door handles can always be replaced.

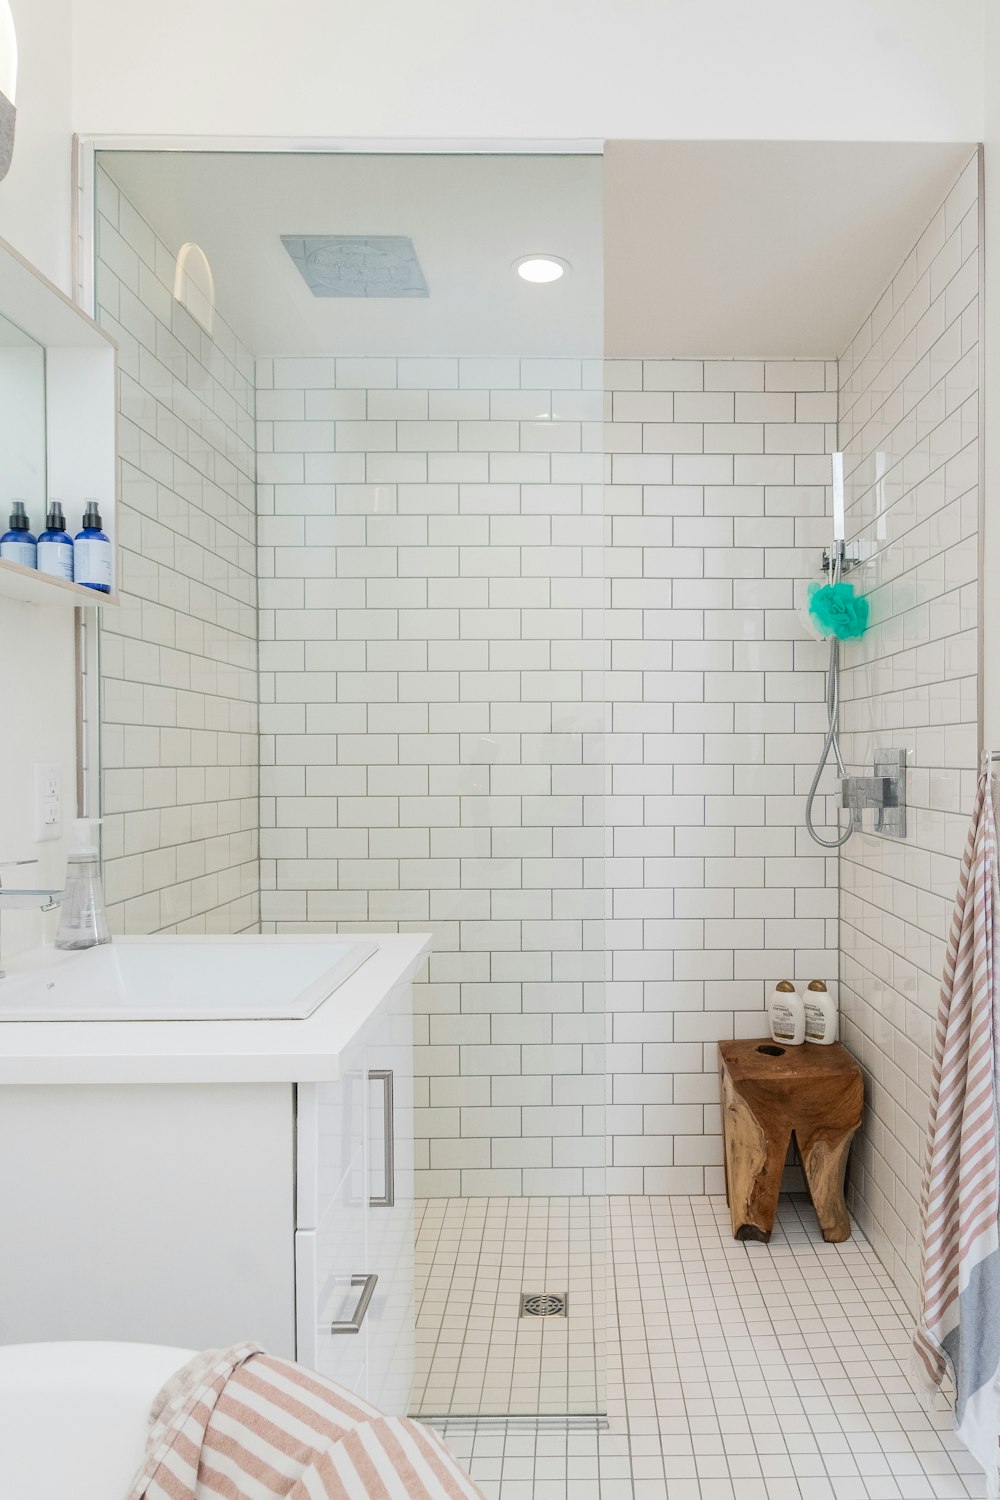
3. Remove the Old Vanity

This third step is where things start to get a little tricky. Homeowners who aren’t very strong or don’t have the right tools can visit Express-Handyman.com to get help with the rest of the process. Otherwise, follow these steps in removing the vanity to avoid plumbing disasters:

Shut off the water supply

Loosen the slip nut

Disconnect the supply lines

Cut the sealant

Remove the counter

Remove the sink top

Disconnect the vanity from the wall

Dispose of everything properly

4. Place the New Vanity

Some vanities are easier to install than others, but all require leveling and careful placement. Place the vanity in its future position and trace the outline on the wall before using a stud finder and marking the studs. Once the vanity is level, mark the holes for screws and water pipes.

5. Complete the Vanity Installation

Use three-inch drywall screws to attach the vanity to the wall through the pre-drilled holes. Some homeowners also like to use wall anchors for a more secure installation. Once the vanity is attached to the wall, install shims and, if necessary, quarter-round molding to cover large gaps.

6. Install the Plumbing

Place the gasket on the faucet and screw on fastening nuts, then insert it into the designated hole in the vanity top. Next, attach the water supply lines and the drain pipe using an adjustable wrench. Keep in mind that this step is easiest if homeowners assemble the faucets and drains before attaching the sink.

7. Attach the Vanity Top

Start by making sure there are no gaps between the vanity and the wall. Next, apply caulk to the top of the vanity base, then set the top into position and press down. Check again to make sure the top is level and flush with the wall, then add a backsplash, if necessary, once everything is in its final place.

8. Reconnect the Plumbing

Finally, connect the faucet water supply lines and reconnect the P-trap to the drain. Test the sink and plumbing for leaks before installing the pop-up drain, then sit back and relax. As long as there are no leaks, the project is done.

An Easier Alternative

If it sounds like installing a new vanity is a lot of work, that’s because it is. Homeowners who don’t have the time to tackle bathroom renovations can always hire a handyman. Handyman services offer an affordable and far more convenient solution than undertaking DIY projects alone.

0 comment
Share:
7-reasons-to-renovate-your-bathroom

People spend a lot of time in the bathroom – bathing, getting ready for the day or for bedtime, and meeting personal needs. So, this room should be a pleasant place to spend time in, it should be convenient, and it should offer privacy. If a person likes to soak in a tub, the bathroom should have a soaking tub. If a family member likes to take showers, there should be a nice shower. Homeowners are no longer settling for a small crowded bathroom that is inconvenient to use. They want more.

Is It Time to Renovate The Bathroom?

Because a bathroom renovation requires planning, effort, time, and financial outlay, it is a project that homeowners are reluctant to take on. But, home bathroom renovations are a good investment if they are done correctly. Homeowners may renovate their bathrooms for seven or more reasons. The bathroom that the buyer walked through when purchasing a home might have seemed OK, but after living in the home for some time, that same bathroom might not be adequately meeting the family’s needs.

Bathroom Renovations Can be Costly

The family may be interested in adding Cast Iron Bathtubs and other popular features. But, is it time to renovate? A serious bathroom renovation can cost from $12,000 to as much as $90,000. Some families do a lot of the work themselves to save money and some bathrooms get low-cost renovations such as a new bathtub or a simple paint job. This renovation project requires some licensed, professional help including electricians, plumbers, building contractors, and ceramic tile or natural stone installers.

Seven Common Reasons to Renovate Bathrooms

In addition to just hating everything about the family bathroom, there are practical reasons for taking on this renovation project. The reasons families renovate bathrooms include:

1. Make the bathroom function better with a better layout and more storage. Get rid of leaking toilets and faucets. Install a water-saving showerhead that functions better and makes showering more enjoyable. Add lighting above the vanities and other dark corners of the bathroom. Add a double vanity where there was only one sink. Add towel bars so everyone has adequate space for their towels.

2. Solve ongoing plumbing issues in an outdated bathroom by renovating the bathroom. Plumbing and electrical issues can be addressed during a renovation when licensed professionals are employed. Problems with drainage and water pressure are often caused by plumbing mistakes or old plumbing that needs modernizing.

3. Add value to the home with a bathroom renovation that meets modern bathroom standards for home buyers. The homeowner will spend anywhere from a few thousand to as much as $90,000 on a bathroom renovation so it should increase the value of the home and make it easier to sell the house when the time comes. A good bathroom renovation can have as much as a 50% return on investment for the homeowner.

The most important improvements to add value include updating worn-out items, getting new modern bathroom fixtures, and making the bathroom more functional. Take the time to visit home improvement centers with model bathrooms to learn what colors and finishes are popular now.

4. Improve the energy efficiency of the bathroom with new low flush toilets and water-saving shower units. Every aspect of an old, outdated bathroom can be wasting either water or electricity. New heating and lighting fixtures can save energy and improve bathroom comfort. Water is costing more and more, so using water-saving toilets and faucets is important.

5. Add a whole new bathroom where one is most needed. If the family home has only one bathroom to serve both parents and children, a new bathroom might be considered a necessity. Finding the budget and space to add a new bathroom could be a challenge. A master bathroom added adjoining the master bedroom would be a good investment. If the bedroom is large or has a guest bedroom next-door, space could be taken from both areas to add a master bathroom. Adding a whole new bathroom will require the services of a building contractor specializing in bathroom renovations.

This is because the new bathroom must be hooked up to the home’s existing electrical and plumbing systems. This requirement will limit where the bathroom can be located and may affect the size of the finished bathroom.

6. A renovated bathroom can better meet the family member’s needs including more storage. Even with a small renovation budget, homeowners can get the best return for their investment by concentrating on projects such as replacing the bathroom vanity, sinks, faucets, and countertop. Natural stone countertops are a good investment and are durable and easy to clean.

The bathroom flooring can be replaced with ceramic tile, good-quality vinyl, or natural stone tiles to be waterproof and durable while looking stylish. The new floor can also have radiant heating under it for added comfort in cold climates.

The tub and shower features can be combined or separate depending on the size of the bathroom and the budget. Especially in master bathrooms, a walk-in shower is a good investment. The tub should be a nice deep soaker tub if there is space for one.

7. Add beauty and style to the bathroom with a facelift that meets modern design and decor standards. Don’t use colors and decor items that will soon go out of style. Instead, go for a more timeless style and color scheme that will be enjoyable to live with for years to come. Add spots of bright color with towels and shower curtains that can be changed at will.

Keeping Costs Down

A homeowner can keep costs down by shopping for materials carefully and taking advantage of sales and closeout pricing. If the budget is limited, go for standard shower features and skip the heated floor feature. Go for quality, energy-efficient products with a timeless look. Don’t buy cheap products, take the time to find good-quality products at sale or clearance prices.

The effort and money invested in a renovated or new bathroom will pay for itself every day the family uses the room in its new, improved form.

SHOP BATHROOM ACCESSORIES….

0 comment
Share:
room-reveal-farmhouse-powder-room

Well, my 4 weeks are up and it’s time to reveal my new farmhouse powder room!

It has been a busy 4 weeks – I have pushed myself out of my comfort zone and made a major transformation in my powder room. I love my farmhouse powder room and so have my friends and family.  The new look is truly incredible and I did not go over budget BONUS! Let me show what I did to create my farmhouse powder room….

A look back at my powder room…..

BEFORE

This powder room was dark and dull – the cabinets are right of out of 1981 and the whole room just looked blah…I really wanted to add a brighter colour, make the room fresh and have a farmhouse powder room.

My farmhouse powder room – what I did…

I knew I wanted a brighter and fresher feel in the room.  The big element here was paint.  I’m fortunate because I had almost a full can of a warm beige-y colour (it’s actually the same colour I have in my other 2 bathrooms) HUSH by Benjamin Moore This new colour on my walls has made a huge difference! The powder room looks so much bigger and brighter (honestly I still cannot get over how fresh it looks).  The next paint project was painting that vanity! I love the look of chalk paint and I thought to get the farmhouse look a chalk painted vanity would be perfect! I chose a great chalk paint colour from Rustoleum ‘Country Gray’ and I love it!!

I was going to paint my existing hardware but after doing some looking around – I found these bar pulls in an oil rubbed bronze – they have a more modern look than my old ones, they are a great price and I had room in my budget so it was perfect! I did have the brushed nickle in my cart but I then realized with my existing hinges (and limited budget) I should stick with the oil rubbed bronze – I love how this vanity looks like a piece of furniture with the new paint and hardware. These bar pulls make a big difference in updating my farmhouse powder room.


I have always wanted to do something with my window but I never really figured out what – I found an awesome tutorial for a new-sew window valance and that was the plan but then I found this valance at Target – it fit in my budget and the colour is perfect! The rod was a great deal, too!


What I didn’t get done…

I purchased some spray paint that was supposed to be used for my counter tops – it has not yet arrived so this did not get done during the challenge.  I’m a bit disappointed as I was really looking forward to changing it but now that everything else has been painted – I’m not sure that I need to paint it! I’ve asked friends and family what they think and it’s a 50/50 split of whether to paint or not – let me know what you think I should do, I’d love to hear your thoughts…..


Styling my farmhouse powder room….

I lucked out with some art from my sister that she was no longer using.  I also have this old wood ‘mailbox’ piece that I purchased years ago and I have always loved it but never found a home for it – it has been sitting in my office collecting dust for about 6 years – it is a great piece that works with the farmhouse look I am after so I was super happy to give it a ‘home’. I used this amazing product called ‘Gorilla Hooks’ to hang it – so easy!

I also had some decor items here that were just sort of extras like the wicker basket with my ‘guest towels’, the large mason jar with some faux greenery that I took from an arrangement in my dining room (just two branches), I had the ‘iron’ owls from my family room.


I used some white bar towels for my guest towels and rolled them up and put them in the basket -so simple – but that’s what farmhouse is all about, right?

My towel bar, lighting and mirror were there before – but with the new paint they kind of look new, too!

Get a farmhouse powder room with only $100

So here’s my budget breakdown …

Chalk Paint                                        $24.64

New cabinet pulls                             $4.79 (x4)

Paint starter kit                                 $8.00

Curtain rod                                         $3.99

Curtain Valance                                 $10.99

Spray paint                                         $30.05

Mirror                                                  already had

Wall paint                                           used left over from my other 2 bathrooms

Art                                                        already had

Decor accessories and towels         already had

Gorilla hooks                                     already had

Total spent                                          $96.83

Even though I have not yet used or received my counter top spray paint I still included it in my budget – without it I would have only spent $66.78 !

Farmhouse powder room photos


I still cannot believe that this is the same room – the transformation is just incredible! I feel great about the end results and I feel great about all of the painting that I took on – there’s a first time for everything! When you ‘shop your home’ it is really amazing what you can find and what you can give new life…

Be sure to check out the other participants in this round of the $100 Room challenge – it is reveal week and there are so many amazing projects in this challenge –


7 comments
Share:
100-room-challenge-week-3-powder-room

3 weeks into this round of the $100 room challenge and I’m happy with the progress in my powder room….I am still amazed by the power of paint and how it can completely transform any room….take a look at how my powder room looked 3 weeks ago…

BEFORE

This is my second round of this challenge and it is so much fun! I love how it keeps me on track with my budget and focused on getting the project finished.  It is also really inspiring to see what other bloggers and IGers are doing. Did you catch Erin on the Rachael Ray Show? So many great ideas from Erin and all the other bloggers in this challenge – it is really fun to see how others stretch their budget and creativity! I have to say that this round I have ‘stepped it up’ from my first challenge.

Powder Room progress ….

Last week, I tackled painting the walls of the powder room and I’m loving the difference this ‘new’ colour has made so far.  I used paint from another project in my home and the colour is making such a difference already! I had to paint a second coat of paint on the powder room walls and if I am being honest – I wasn’t overly motivated to stay inside and paint.  Not because I’m not happy with how it is looking (quite the opposite) but….it seems like summer has finally arrived here and the weather outside is hot and sunny, so I really want to enjoy that while I can!

I did find that painting the second coat seemed to go much faster than the first coat – now maybe that is just me being motivated to get out and soak up some great weather!

I have also painted the vanity in this amazing shade of ‘country grey’ in a chalk paint! So exciting!! Originally, I planned on using a deeper charcoal tone for the vanity but my husband talked me into this mid-tone grey….I admit – this colour is a good choice – there is still contrast in the room and with this tone my new hardware pulls will stand out more!

I was going to recycle my handles (see below) but it was almost the same cost as buying new handles, so I purchased 4 new pulls instead.  The new ones are cleaner looking and still in the oil rubbed bronze finish (to match the existing hinges).  The new handles (although there are only 4) will give the vanity a fresh new look – I’m dying to install them!


‘Powder Room project’ confession time….

There have been a number of firsts for me on this project and I’m almost embarrassed to tell you but here goes….this my first time painting a room. ( Erin was completely honest about her DIY experience so I feel I should be, too.) Yep! I have painted my fireplace and a front door but never an entire room! I’m happy with how it turned out!

Something else I learned…how to patch the holes in my cabinets – this tutorial from Rainonatinroof.com is amazing and so simple….

Another first….I have never used chalk paint! I have to say I love chalk paint and I’m already trying to figure out what I can paint in chalk paint next! I was a bit nervous about it but it goes on so smoothly, the coverage is great and I love the super matte finish.  This has given my vanity new life! The image below shows off the new wall colour and 2 coats of chalk paint on the vanity – what do you think?

Yes, my doors are still attached to the ‘box’ of the vanity and I know the doors should be removed, painted and once complete, re-attached.  I didn’t realize the condition of my vanity until I started painting it this weekend – it is about 35 years old and it’s showing it’s age….I was worried that I may not be able to re-attach them. So I kept them on and painting them that way – not ideal but I’m making it work.

Counter tops…

Many of you have asked and comments about painting my counter tops. I am really excited (and a bit nervous) about painting my counter tops.  The paint has been ordered – I had to order online since all of the local stores were SOLD OUT! The paint has not arrived yet and it is cutting it close! I checked my order and it is supposed to arrive between Sept 20 (that’s today) and Oct 2…..so I may not get these counter tops painted before the 1 month timeline of this challenge is up….Well if I don’t get it on time – I will be sure to have a new post dedicated to painting my counter tops!

And I have to admit with all the fresh paint in this space – my counter tops that were already looking dated and dull look even more so….


Powder room to-do list:

  • prep and paint the walls of the powder room
  • paint or purchase 4 new cabinet hardware pulls
  • start (and finish) painting the vanity in chalk paint
  • install new cabinet hardware
  • hang up window treatment
  • touch up paint
  • paint counter top (waiting patiently for paint to arrive….)
  • hang up mirror and art
  • style the space with towels and greenery

The remaining items on my to-do list seem lengthy but it’s a lot of small jobs and I’m so excited to finish up this powder room, motivation will be driving me to get this done!

Budget so far….

4 new bar pulls for vanity ($4.79 each)

Chalk paint for vanity ($24.64 on sale!)

paint brush, roller and tray starter kit ($8.00)

counter top spray paint ($30.05)

curtain rod ($3.99)

I found a pre-made curtain valance for $10.99 at target so I purchased that instead of making my own but I want to try this DIY valance by 12 devonshire in my family room!

95.84 is the total spent!! Maybe I can find a cheap greenery piece at the dollar store!

Be sure to check out the other bloggers participating in the $100 room challenge…


Every time I pop into my powder room I just can’t get over the difference already – so I cannot wait to get this makeover done !

Next week is the room reveal….so exciting!

14 comments
Share:
100-room-challenge-week-2-powder-room

It is week 2 of this $100 room design challenge and let me tell you about the progress so far….

But first, let me bring you up to speed on the challenge –

I decided that my room that needed an update (that was over looked when we did some renos 6 years ago) is our powder room.  Our powder room like most other homes is a high traffic room with lots of visitors ranging from family to friends.  The room was dark brown with cabinets right out of the 1980’s (when our home was built) and some laminate counters.  With this challenge I decided to really focus on giving this powder room a fresh look with a bit of a farmhouse look.

Take a look at week 1 , HERE

BEFORE


BEFORE

Design challenge decisions…

I knew that this room needed paint – and pretty much everywhere. With a budget of only $100 I didn’t want to just spend that money on paint – this room needs so new decor accessories, maybe some towels too. Sticking to the budget and making a big change is really the premise of this design challenge. So for my wall colour –  I knew I had some paint from other painting projects in my house.  I had 2 cans of paint that were almost full – so I had to decide which of those two colours I liked best for the space.

Paint option #1 – Benjamin Moore ‘HUSH’ AF-95  This is a great warm neutral (my other 2 bathrooms are this colour, too) I’m not why I have almost a full can left but I did!

Paint option #2 – Benjamin Moore ‘JUTE’ AF-80 This is the colour seen in the main part of my home.  It’s a soft neutral a bit on the cooler side compared to HUSH.

I compared both colours in the powder room and decided on HUSH.  I like the warmth and the JUTE hue was looking a bit green and I’m really trying to downplay the green tones in my floor tile.

Now that my colour was selected, I was ready to start painting except I could not find my paint brushes ANYWHERE….I looked all over my house – the basement, the garage etc…no luck. So I had to buy some new brushes, I really did not want to spend any money from my budget on brushes but I really had no choice. I lucked out and found this great little ‘starter’ kit at Wal-Mart.  maybe not the best quality of brushes but this handy little kit had 2 rollers (one large, one small), a brush, drop cloth and the tray for $8.00

Time to get started on the challenge….

Paint colour is picked and now it’s time to start.  I wanted to get the paint colour on the walls first for a few reasons….1 – I wanted to see the colour on the walls since I was undecided on what colour I want to paint my vanity. 2 – The walls are the biggest painting job, so I wanted to get it out of the way.  3 – With the walls being so dark, I knew I needed to tackle those first as they would probably need the most paint and …4. I had the supplies on hand.

And so far, so good….

Already the difference is incredible…..

The first coat is done and I need another coat for sure but the difference is amazing.  The bathroom is SO much brighter and clean looking, too! My husband is loving it, too (usually he doesn’t say much when it comes to home decor)

Check out the other room makeovers in this challenge….


Next up…..

2nd coat of paint (possibly a third but only if necessary).

Painting of the vanity is next – I’m thinking a charcoal chalk paint….

Painting the counter tops (so excited to see how that turns out!!)

I like my vanity light and mirror – so those will stay …

I have some ‘new’ art from my sister (she always has decor stuff lying around…)

If my budget allows, I’m hoping to find some greenery (faux) to add some freshness to the bathroom

The budget so far is not blown so hopefully I can stay on track with the workload and budget…fingers crossed!

Let me know what you think of the change in my powder room so far….

15 comments
Share:
100-room-challenge-week-1-powder-room

$100 Room challenge …

It’s time for the $100 room challenge! This amazing and really fun challenge was started and is still hosted by Erin from LemonLavenderandLaundry.com. Basically here is what this challenge is all about – a bunch of bloggers and IGers take on one room in their home and in one month’s time and with only $100 – they transform the room, tracking and sharing their progress week by week to share with you. Want to know more and check out some past projects? Click here

This is my second challenge – my first challenge was a homework station for my kids (which I needed to get done before they headed back to school).  This time around I have something different in mind….

Powder Room Makeover!

We moved into this house 6 years ago this month and when we moved in we had big plans for this dated and dark powder room but with 2 little ones and the third on the way – we had other priorities but now that 3 of my 4 kids are in school – I can take advantage of some free time during the day and at bedtime to transform this space.  Let’s take a look…

So this is it! Our powder room – it has a lot of cabinet space and we have looked into a whole new vanity to give this room a fresh look but the cost is higher than we would like as it is a custom size.  The counters are laminate and the walls are a deep and dark brown.

My powder room plan

The whole room needs to look and feel fresh so I’m going to be using A LOT of paint.  I’m painting the walls, the cabinets and the counter top!

I want to create a bit of a farmhouse look in this room. The cabinets are kind of a ‘nothing’ colour so I’m going to paint them in a chalk paint – deciding between a warm white or a country grey – I have never used chalk paint before so I’m a bit nervous but I can do it!  Which ever colour I pick for the cabinets will determine my direction for the counter tops – I’m so excited to be able to paint these ugly laminate counters!! I also planning on replacing or painting the hardware of these cabinets.

I am also planning on changing out my art – I know someone in my family will have something hanging around in a basement or closet.

I have that long counter top – so I want to add some easy decor their too – like some greenery and perhaps some jars – I will be looking around the house to see what I can re-purpose.

Materials list for my Powder Room Makeover

  • paint for my walls (I have lots left over from painting my house)
  • chalk paint for my vanity
  • spray paint for the counter tops
  • art for the walls (checking my house and asking friends and family)
  • 4 handles for the vanity doors
  • accessories like towels, decor pieces and greenery (will see if I can find some deals in stores or re-purpose from my home)

Powder Room inspiration

Photo credit : Jenna Sue Designs

I love this bathroom – the soft paint colour with the white plumbing fixtures keeps the space looks fresh and clean.  I also love the decorative accents like the reclaimed wood, the greenery and the white plush towels.

Photo credit : unknown

I love the warm grey colour of this cabinet and this is one of the colours that I am considering for my vanity. I also love how fresh and bright this bathroom is and the accessories are cute, too!

Be sure to check out the other $100 rooms in this challenge….


I’m really excited for this much needed transformation and of course this timeline is going to keep me on track – Wish me luck and as always feel free to offer me advice and your opinion!

SHOP BATHROOM…..

14 comments
Share:
we-answer-wednesday-quick-bathroo

“I am in need of a makeover for my bathroom.  I don’t have a big budget so I cannot renovate but I need some quick and easy ideas to freshen up my bathroom.”


The bathroom is one of the smallest but also one of the most used rooms in the home.  A renovated bathroom can be costly and time consuming but you definitely have some easy updates that are quick and affordable that can really make a splash!


Try working with the colour scheme in the bathroom instead of against it.

  So if you have coloured tile – add some complimentary colour in there.  If you fight with the colour or ignore it – you won’t get the end result you want!


Change up the textiles

– easy and affordable! So add a new shower curtain and liner, add some new towels too and maybe even a bathmat! Stay from toilet covers…


Add some fresh bling

– so switch out your old cabinetry hardware and add some new knobs or handles! This is a quick change but it really makes a difference (this is also a great update for a kitchen). If you are handy, you could even update your towel bar an toilet paper holder.

Switch up your mirror

– adding a new mirror with a decorative frame will instantly freshen up your space and give it a custom look and feel without the custom price tag! If your lighting is looking a bit dated (and you are handy) consider updating the lighting as well.

Add some accessories

– a plant, some art, candles, new soap dispensers – easy updates that make the space feel and look new again!

If you are looking to take it to the next level, consider paint!

It’s a small space so it would be a quick weekend job but be sure to get the right paint so let the salesperson know that you are painting a bathroom.

Sprucing up your bathroom is also a great idea if you are considering selling your home.  When we stage bathrooms we like to keep them clean and clutter free but also styled in neutral tones and add some accessories to set the scene.

The bathroom might be small but don’t forget to make it beautiful too,

0 comment
Share:
we-answer-wednesday-colour-in-my-a

“We live in a new home and we were able to pick all of our interior finishes.  We both love a white bathroom – it is so clean but our master bathroom is completely white and although we love the white it’s just too white! What can we do to add some colour to the bathroom without an expensive renovation?”


White is a great ‘colour’ for a bathroom – it’s clean, it’s fresh and it’s timeless! But you are right too much of anything isn’t good.  Any room in one tone starts to look and feel a little one dimensional over time but have no fear, we are here to help!


Even though the bathroom is a small space, you do have a lot of opportunity to add colour, texture and personality to your bathroom.


1 – Shower Curtain

– pattern, colour and maybe even texture.  To keep it simple, use the shower curtain as your inspiration or jumping off point for the other elements like the linens, paint etc…Be sure to have a liner so your shower curtain is protected from the water in the shower

2 – Lovely linens

– towels and a bath mat can add colour, pattern and texture. The texture of the linens adds some softness to the bathroom (which is already full of hard and smooth textures) and try mixing some colour and pattern with your towels.


3 – Framed art

– look for some wall space to hang some colourful or calming art.  Photography is also a great way to add some personality to the bathroom. Find art that adds to the mood you want in the space.  there is no wrong answer and no price tag…go with what works!


4 – Unique lighting

– lighting is a great way to add some personality.  Overhead, vanity, sconces – bathroom lighting doesn’t have to be boring.  It can add drama, glamour, elegance or even a funky vibe to your bathroom.  There are so many options for lighting and it can really enhance the look of your space – not matter what room it is!


5 – “Custom” mirror

– replace your builder grade basic with something framed – there are many options – this automatically and (easily) adds a custom look and feel to the bathroom.  Double sink, add 2 matching mirrors and matching vanity lighting – a very upscale look (this is also a great upgrade if you are considering selling your home).  We love this image because it mixes the framed ‘custom’ mirror with bold wallpaper and these sconces.  Such an elevated and upscale powder room


6 – Display space

– small floating shelves over the toilet or maybe a small corner on the counter top or maybe even around your tub (it depends on the layout of your bathroom and the amount of space you have).  Try adding some plant or flowers, candles and vases are also a nice touch.  We love using a small tray to group your display items together.


7 – Touches of wood

– a few wood accents can really break up the wood and add an organic spa feel to the space. Think small accessories, wood frames mirrors, bathroom stool even wicker baskets for toiletries


8 – Paint!  

adding paint colour (or wallpaper) to the walls will definitely change up the look of the bathroom and give it instant personality. Be sure to think about how you want the bathroom to feel and let that steer you towards the paint.  Something calm should have a soft and soothing tone but it you want drama opt for depth.  Because the base is white you have so many possibilities


9 – Get Creative

– try using an unexpected piece in the bathroom like a stool or side table, these are great by the bathtub and it really adds some personality, too

The great news about having an all white bathroom is that you truly have a blank canvas and you can add any accent you like.  Wood and other organic textures with calm tones can give your bathroom a beach-y or spa feel; black and a metallic accent like gold can give the room a luxe or glam feel; adding aqua or even a soft pink gives the bathroom a retro look….the possibilities are endless!

An all white bathroom is clean and fresh but add a few accents to make the space more pleasing…

0 comment
Share: