
Looking for the perfect chair to add to your home?
We chose four chairs have stood the test of time and are versatile options for any décor and any room in your home. These chairs have lots of history without looking like something from Grandma’s house. These clean-lined and sleek chair options are not only practical for your home, they’re also a classic choice with a modern twist!
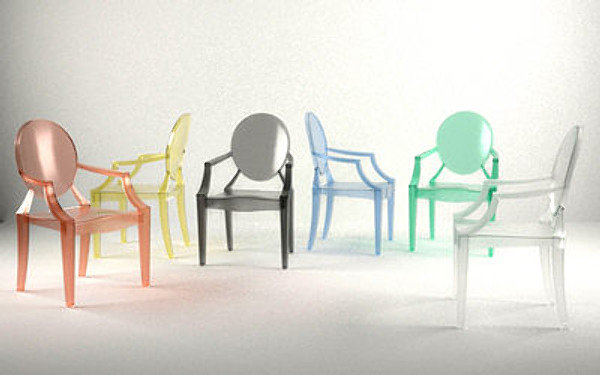
The Louis Ghost – Chair by Phillippe Starck (2002)
This modern take on the classic Louis XV chair is a fabulous addition to any interior.
This chair can be used in so many different ways; it can be used as a dining chair, or as an accent chair in a living room or bedroom. Below is a photo of the ghost chair as a seat for a make-up table. The options are endless, as are the colours! The Ghost Chair is a fantastic neutral, which makes decorating with colour and pattern much easier (and more fun!). They also come in kids sizes as well. Try this chair against a wall with a bold wallpaper, or with a patterned throw pillow!

The Panton Chair – by Verner Panton (1960)
Verner Panton’s stacking chair was the first single-material and single-form chair to be made.
It is a timeless chair and striking sculptural piece that is used frequently in modern interior design. It is a durable, statement chair that comes in many colours and complements a variety of different décor. This chair is incredibly low maintenance. The Panton chair can be used in a bedroom at a makeup table, or in a dining room! This chair would make a fantastic addition to any contemporary room and can be used in many ways.

The Egg Chair – by Arne Jacobsen (1958)
This Scandinavian style chair originated in the 1950’s and is a staple in modern design. The Egg chair is a simple, yet colourful addition to any design. It is versatile enough to be placed in a variety of different décor. If you need a pop of colour in your home, this chair is comfortable and classic! Egg chair comes in many different colours and can be used in many different spaces including: a living room, bedroom or office space. (It’s also been seen in tons of movies!) This is another example of classic design standing the test of time; it will never go out of style!

The Barcelona Chair – by Ludwig Mies van der Rohe (1929)
The classic simplicity of the Barcelona chair is one of the many reasons that this is such a staple in interior decorating. The Barcelona chair has been around for decades and is still a super popular seller in many stores around the world. This chair is a great option for many different areas of your home. The clean lines and leather with chrome base make the Barcelona chair a go-to for modern and contemporary interior design but the sleek lines make it an option for many different décor styles. It also plays well with others! So don’t be afraid to mix and match this chair with your existing design!


