Browsing Tag

DIY

drips-drains-and-decisions-the-good-and-bad-of-tackling-plumbing-repairs-yourself

We’ve all been there – that ominous drip, the gurgling drain, or the sudden flood that turns your home into a makeshift waterpark. When faced with plumbing issues, you’re presented with a critical choice: do you roll up your sleeves and tackle the repairs yourself, or do you call the professionals? It’s a decision that requires careful consideration of potential rewards and pitfalls. Here, we’ll guide you through the ups and downs of taking on plumbing repairs on your own.

The Upside of DIY Plumbing Repairs

  • Cost Savings: One of the most enticing aspects of handling plumbing repairs yourself is the potential to save a significant amount of money. Plumbing services can be costly, and you eliminate labor charges and service fees by taking matters into your own hands. Simple repairs like fixing a leaky faucet or replacing a worn-out washer can be surprisingly cost-effective when done DIY-style.
  • Empowerment and Learning: Successfully repairing a plumbing issue can be an empowering experience. It gives you a sense of accomplishment and boosts your confidence in handling household problems. Additionally, as you delve into plumbing repairs, you’ll gain valuable skills and knowledge to serve you well.
  • Immediate Action: When a plumbing problem strikes, the last thing you want is to wait for a professional to arrive. By tackling the repairs yourself, you can take immediate action, minimizing the potential damage and inconvenience caused by leaks, clogs, or other issues.

The Downside of DIY Plumbing Repair

  • Risk of Making Things Worse: While a DIY approach can be rewarding, it also comes with the risk of exacerbating the problem. With proper knowledge and experience, you might avoid worsening the situation, leading to more extensive damage and costly repairs in the long run.
  • Time and Effort: Plumbing repairs can be time-consuming and physically demanding. What appears to be a simple fix might turn into a day-long project, disrupting your routine and causing frustration. Additionally, the time you spend researching, troubleshooting, and executing the repair might outweigh the potential cost savings.
  • Lack of Equipment and Expertise: Professional plumbers can access specialized tools and equipment for specific tasks. Attempting to work without these tools can make the repair process more challenging and less effective. Moreover, some plumbing issues require a deep understanding of complex systems, which you might not possess as a DIY enthusiast.
  • Safety Concerns: Plumbing involves handling water and potentially hazardous materials. Without proper safety measures and precautions, you could expose yourself to health risks or create unsafe conditions within your home.

Finding the Middle Ground

Before deciding to tackle plumbing repair yourself, evaluating the severity of the issue and your own skill level is essential. Minor repairs like fixing a leaky faucet or unclogging a drain are generally well-suited for DIY efforts. However, for more complex problems like a burst pipe or a malfunctioning water heater, it’s often wise to enlist the help of a professional plumber.

If you’re determined to take the DIY route, consider these tips:

  • Educate Yourself: Research the specific issue you’re facing, watch tutorials, and read guides to understand the problem and potential solutions thoroughly.
  • Gather Tools and Materials: Ensure you have the necessary tools and materials before starting the repair. This will save you time and frustration as you work through the process.
  • Take Your Time: Rushing through a plumbing repair can lead to mistakes. Be patient, follow the steps carefully, and don’t hesitate to ask for help if needed.
  • Know When to Stop: If you encounter unexpected challenges or realize that the repair is beyond your expertise, calling in a professional is perfectly okay. Knowing your limits can prevent further damage and ensure a successful resolution.

Conclusion

Drips, drains, and plumbing decisions – the DIY approach to tackling plumbing repairs has merits and drawbacks. While it can save you money, empower you with new skills, and provide immediate solutions, it also risks worsening the problem, consuming your time and effort, and lacking the necessary expertise and equipment. Before embarking on a DIY plumbing journey, carefully assess the situation, weigh the pros and cons, and remember there’s no shame in seeking professional help when the going gets tough.

0 comment
Share:
how-to-do-a-diy-renovation-of-your-kitchen-on-a-budget

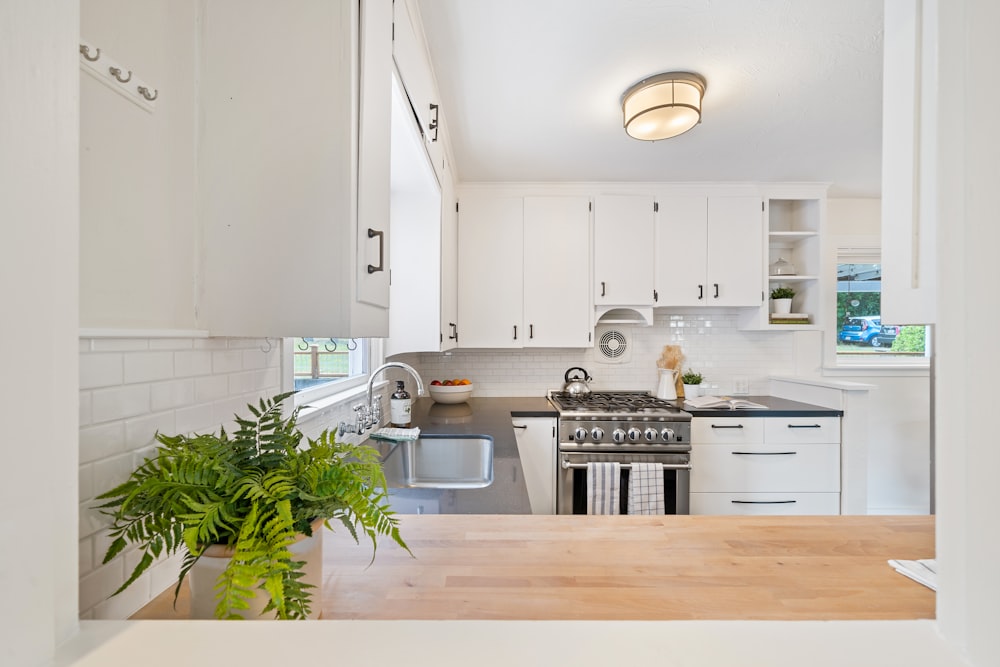
There comes a point in every homeowner’s life when the kitchen starts to look a bit dated. If you are on a strict budget then you may feel like you just have to live with it since kitchen renovations can be so expensive. The problem is that a dated kitchen will eventually be one that is not very usable as things progressively get worse. 

There are ways to save money on renovations, including the kitchen. In fact, with the right strategies, you can update your kitchen for thousands less than you would expect to spend. Sometimes, a renovation can be a hybrid between an actual renovation and a makeover. Both can make the kitchen more functional. 

In this article, we will go over some of the ways you can save money doing a DIY renovation. 

The cabinets

There are two main things that should be changed in a kitchen renovation. The cabinets and the appliances. The appliances are an obvious one since old ones don’t work well and are not nearly as energy-efficient as new ones. Buying new appliances will essentially pay for themselves. 

However, new cabinets will transform the kitchen in many different ways. You can organize your kitchen to be more useful since you will improve its workflow. And it will also look updated and not like a retro throwback to an earlier time. 

RTA kitchen cabinets are the best choice since they are ready to assemble which makes them ideal for the DIYer. Even if you aren’t very handy, installing cabinets yourself is doable and will save a ton of money. 

The flooring

Putting in a beautiful hardwood floor can be very expensive. The materials cost a lot and it requires a professional since it is usually beyond the ability of most DIYers. However, you can have a beautiful-looking floor that replicates hardwood for a fraction of the price and easily install it yourself. 

There is what is called a floating floor or laminate flooring. These are basically planks with a cover on them to simulate hardwood but are actually laminated plywood. They are called floating floors because they are installed over the existing floor over a styrofoam blanket and actually can move around to a degree. 

They cost a fraction of a hardwood floor and can be installed easily in a day if you work in two. They click and lock on each other so there is nothing to assemble really. The only thing you need to do is cut them at their ends to fit against the wall with a gap so they can expand. 

Give it some paint

Once the cabinets and floors are done, a fresh paint job is going to seal the deal. The look of the kitchen can be tied together well with the right color scheme. It is what will update the look and bring it to modern times instead of looking like a blast from the past. 

Pick the colors that will work best with the color of the floor if you decided to go with a natural wood effect. 

FOR THE KITCHEN…

0 comment
Share:
diy-projects-to-do-at-home-with-your-kids

With the summer months approaching, you may be panicking when you think of things to do to keep your children occupied while on summer vacation or on the weekends. You may not know how you are going to keep them busy and out of trouble while also doing the things around the house that you need to. But what if there was a way to keep them occupied while also allowing you to do the DIY projects you have been meaning to get to?

This post will detail 4 fun DIY projects that you and your kids can do together this summer; not only will your children be occupied, but they will also be helping you make the small home renovations you have been wanting. 

What Are Some DIY Projects to Do With the Whole Family?

DIY projects are great for a number of different reasons. Not only will you be able to create the exact project you have had in mind, but you will also save money and be entertained while doing so. With that being said, DIY projects that include the whole family takes those benefits one step further. Here are 4 DIY projects that will keep the whole family engaged this summer. 

  1. Repurpose Old Furniture

Getting new furniture is costly, especially if you have little ones. But what happens when you desperately need a new coffee table or outdoor sofa? A great DIY solution is to repurpose old furniture. If you have old furniture, consider making it a family affair and redoing it somehow. Consider repainting it, refinishing it, or even reconstructing it for parts. 

This DIY project will save you money and can be done as a family. If you don’t have any furniture that you want to repurpose, consider buying secondhand furniture either online or at a secondhand shop. 

  1. Make Your Own Wall Decor

This is a great way to get the family involved and create meaningful wall decor. Some DIY wall decoration ideas include:

  • A gallery wall; hang your children’s artwork and family photos to cover an entire wall
  • Custom made/painted wooden signs
  • Paint murals as a family to hang on your wall
  • Homemade dream catchers
  • Make your own stained glass pieces
  1. Get Creative With Storage

Storage is something we all need more of, especially if you’re a parent. Creating storage can be a hassle and extremely time-consuming, however, consider turning it into a DIY project with your children. To start creating storage units with your kids, start in their spaces, either their rooms or playroom, as they will get excited and express interest in this DIY project. 

Some other creative DIY storage projects to consider include:

  • Mason jar brush holders
  • Hanging wicker baskets
  • Hang craft boxes
  • Turn apple crates into shelving
  • Repurposed dresser drawers as shelving 
  1. Create a Gorgeous Garden 

When people think of DIY projects, they often think of projects that have to do with crafts or building something, they don’t typically think of outdoor projects or gardening. However, gardening is in fact a great DIY project to do with the family as you can build the gorgeous garden of your dreams. 

A roofing contractor in Voorhees pointed out that gardens can add to the exterior aesthetic of your home so turning it into a DIY project to do with your family can be worth your while. Consider planting flowers, shrubs, or even fruits and veggies with your kids. To make this DIY project one step further, have your children paint pots to plant things in or create garden decorations as a family. 

Start Your Project Today

Instead of worrying about what you are going to do to entertain your children this summer, look into other fun and exciting DIY projects that you can do with them. Be proactive and try to get the supplies ahead of time so that your DIY project runs as smoothly as possible. 

About the Author

Jennifer Bell is a freelance writer, blogger, dog-enthusiast and avid beach-goer operating out of Southern New Jersey

KEEP THE KIDS BUSY….

0 comment
Share:
4-inexpensive-ways-to-transform-a-room

We’ve all been struck with the intermittent room overhaul itch, especially after reading a particularly inspiring room transformation article. Oftentimes, we don’t know where to start, or have a limited budget that prevents us from fully overhauling a room. Luckily, there are lots of subtle ways to enhance a space without any renovations or draining your bank account. We’ve compiled a few simple tips on how to revamp a room without breaking the bank, yet still becoming HGTV worthy!

Clean House

The first step to changing any space is ditching what you don’t want or need anymore. An Offerup study on clutter published that 72% of Americans believe they would gain more space in their homes by purging unused items, yet 41% of Americans haven’t decluttered in over a year. Clutter has been proven to increase your stress levels, cause a riff in home flow, and even negatively affect your physical health. If decluttering your space will adversely boost productivity and give you the confidence to invite guests into your home while maintaining peace of mind, then why aren’t more people doing so?

Sometimes, all a room needs is a good clean-out to really make a difference. A solid rule of thumb is to follow the “one year” rule. This means that if you haven’t used the item in one year, then it’s time for it to go. Marie Kondo, Japanese room organizer extraordinaire, poses the question, “does it spark joy?” When you ask yourself this question and find that the answer is, “yes, this item does spark joy,” then keep it! On the other hand, if you find that the answer is, “no, this item does not spark joy,” toss it out.

Even better than tossing unwanted items out, consider donating them. This way, the things you no longer use can be given a new start with someone who needs and will actually utilize it! As for those items that still spark joy but you might not use everyday, stow them away in plastic containers, or install floating shelves and wall cubbies to maximize floor space in order to keep your space organized.

Frame Your Life

A simple way to flip your space is by playing with decorative wall frame styles to showcase your existing artwork and pictures in a new way. If you have mismatched frames, it can mess with the flow of a room, so choosing many within the same color scheme and style will make your photos look like they complement one another seamlessly. 

Creating a gallery wall is a great way to combine family photos as well as art prints into one decorative setting. Incorporating 3-D pieces, such as a ceramic sculptures, will make a simple gallery wall pop even more. If you’re looking to do something contrasting to hanging traditional picture frames on the wall, position them to sit on top of a shelf, dresser or cabinet for a more relaxed look. 

Room Accent Swaps

Do you have an overflowing bookcase? If so, change it up by removing books and placing medals, antiques, or trinkets in the space instead. This will diversify your room decor while also providing you with an opportunity to showcase items you love but have had sitting in a box. If you’re wondering where you can put the stack of books you just removed, consider transforming them into a side table by simply placing a tray on top of it. Voila, your room will have taken a whole new look in a matter of minutes! 

Similar to swapping out your books, if you’ve had the same old frumpy pillows sitting on your couch for years, swap them out for new ones. Pillows are usually inexpensive but are a great way to change the feel of a room because they add great texture or color to a space! Larger pillows can give a room a luxe vibe, while patterned pillows can upgrade the space instantly by drawing the eye in.

Become a DIYer

While everyone seems to be ranting and raving about do it yourself projects, you might want to get on board because it actually boasts a lot of perks. Pushing yourself to learn a new skill in order to achieve a task provides you with feelings of satisfaction and confidence. As an added bonus, a DIY project is something that you can either do by yourself or with your family as a fun weekend project. A study on self-made products showed that participants who made their own item valued their creation significantly more than a store bought version.

One great DIY tip that will help you elevate any room is to replace furniture knobs and pulls. Instead of going out and finding a brand new (and often expensive) dresser, swapping out these subtle details will save you both time and money. At only a few dollars a piece, new pulls and handles can completely change the look to any piece of furniture. Similarly, if you really want to transform the feel of a piece, try adding a fresh coat of paint, as it will be sure to refresh the vibe of your space. 

If you were previously unsure on where to start with a room transformation, we hope that these tips will show you how to be creative with limited money to put into a space. After all, giving a room a new life doesn’t have to include draining your bank account, but some effort and a vision can completely change the way you look at a room!

0 comment
Share:
answer-wednesday-chalk-paint

“What is chalk paint? I have heard people talking about it. “

Yes – chalk paint is a term we are hearing a lot …so here are the details.

What is Chalk paint?

Chalk paint is an actual brand of paint – Annie Sloan has trademarked the brand (but there are other similar paints by other companies). But it is a paint used mostly on furniture.  The paint has a flat and chalk like finish and is used to create an aged finish on furniture pieces.  Plus you can distress the finish as well (very easily).

With the popularity of the Farmhouse look in home decor – chalk paint is being used a lot. To update great garage sale finds or transform pieces to give them a rustic, shabby chic or country look. Don’t you just love the charm that the chalk like finish adds to decor pieces and furniture?

Get creative with Chalk Paint:

Frames:

Chalk painting your photo frames or even old frames that you often see at yard sales or online – look so chippy and vintage with a spot of chalk paint.  These look great in a gallery wall

Storage furniture:

Adding chalk paint to a large piece of furniture transforms the look of the room.  This dresser looks aged and adds a romantic look and feel in the bedroom.

Vases:

Trying painting your mason jars . This is a great idea for a center piece, spring decor, weddings and Easter – the finish of the paint and the tones are perfect for the spring season!

Chairs:

I love these chairs – they look like an old vintage find from an old cafe and that robin’s egg blue really adds some personality in the space.

Chalk paint allows for you to get create with some old furniture items, garage sale finds or just updating your space! We all know what a difference fresh paint can make in a space so why not try something new!

It’s only paint…

0 comment
Share:
the-bar-cart-trend

Bar carts having been trending for a while now and we love them too!  They are the perfect open and accessible liquor cabinet plus they look chic.  But we love how multi functional the bar cart is!  here are some of our favourite ideas and uses for the bar cart.

1. Bar cart end table. 

We love this gold bar cart, so 2016! it’s open and airy and just perfect for someone who loves to entertain but we also love how it is being used as an end table in this small space.  Take a closer look the top shelf is styled with flowers and some books – this could be great surface space for coasters too.  The lower portion is used as the bar.


2. Bar cart Coffee station.

Short on kitchen space? Love all things coffee? why not add a bar cart and create a coffee station? We love how useful this is plus it looks great.  It’s great for entertaining, too! Try wheeling it into the living space for after dinner coffee and desserts.  You can also use the lower shelves for open storage of mugs, dishes and more or try adding some baskets for tea towels or store your pretty cookbooks.


3. Bar cart bathroom storage.

OK a glass of wine in a hot bath is a lovely way to unwind but maybe you don’t need a bar cart serving wine and cocktails in your bathroom but here’s an idea…try using a bar cart in the bathroom for some extra storage.  This is a great idea if your bathroom is short on space.  Make it pretty and spa like by adding beautiful and plush towels, candles and maybe a plant or just keep it totally functional for everyday items like towels.


4. Bar cart guest bedroom needs. 

Have an out of town guest? Want them to feel at home? We heart this idea! Add a bar cart to the room and stock it with essentials and a few treats.  This adds a bit of a hotel feel but it makes your guests feel welcome and like this space is theirs (even if it is just for a short time)


5.  Bar cart decor.

We love the open and airy feel of a bar cart so why not use it as an end table? You don’t have to stock with beverages you can just style it as you would any other end table. At first glance, we didn’t even notice this was a bar cart – we just loved the look but this is a great idea, because it is so multi-purpose for when you are entertaining.


6. Bar cart Baby station.

OK not as pretty but very functional.  If you have just had a baby, moving around is a bit of a challenge at first, so create a baby and mommy friendly space that cuts down on moving around.  Keep everything accessible.  Using a bar cart to hold the baby essentials is so smart! And you could easily use this in the nursery as well.


7. Bar cart kids crafts. 

The bar cart is a great way to stay organized and because it is on wheels it can be moved around very easily.  We love the idea of a movable kids art cart!  Keep all of their supplies in the cart and you won’t have to take up other storage space in your home and this way it is easy for them to access.


8. Bar cart music station. 

If you love music, why not use your bar cart to store and display your love and passion for music? We love how this turntable is displayed on a bar cart, genius idea!


9. Bar cart office storage. 

Need a little extra storage space in your office? Try a bar cart! It’s perfect for storing items that you need access too but you don’t want them to take up useful desk surface space.


10. Bar cart outdoor entertaining. 

The bar cart is also perfect for the outdoors.  We love the vertical storage for drinks and other items – it’s easy to clean and won’t be in the way.


We absolutely love pieces that serve multiple purposes now and also in the furniture…

0 comment
Share:
we-answer-wednesday-all-about-holiday
“I am always looking at magazines for ideas for my centerpieces, but they all look so expensive and hard to put together. How can I get that look for my home?”

So many people are entertaining from home these days. This is a fad that many thought wouldn’t stick around but entertaining at home is typically more budget friendly and a great way to show off your beautiful home! There are a lot of different ways to throw a dinner party from a formal party to a backyard BBQ, but regardless of your type of party, 9 times out of 10, there will be a centerpiece on the dinner table.

Here are some suggestions on what to use as a centerpiece for your dinner parties.

Floral centerpieces

– are a classic and traditional option. There are so many different types of floral arrangements that can be present on your table. So how does one decide?
 

Incorporate a colour scheme

Part of hosting is making things look nice for your guests. Plan your floral arrangement based on a predetermined colour scheme. For example, if you have all white dishes and serve ware, incorporating another colour will enhance the table setting. Maybe you love purple and don’t own any purple dinner accessories. A centerpiece is a fabulous place to incorporate it. A white and purple floral arrangement would be a beautiful way to spice up your traditional white dishes.

There are so many sizes and shapes and styles of centerpieces to create. Depending on the size of your table, you may have the space to have multiple arrangements on the table. A series of small vases instead of one large arrangement gives your table a fresh look. It doesn’t have to be flowers either! As you can see in this photo, beautiful and bold lilacs in these oversized teal vases with glass bottles mixing in for fun make a big impact but the arrangement is so simple, paired with robin’s egg blue dinner plates and glasses set on the rough textured, reclaimed wood harvest table looks absolutely incredible for a spring dinner or wedding


Candles

Candles are another classic option for a center piece. These can be arranged in many different ways using various colours, sizes and textures. Candle centerpieces have so much DIY potential, and with sites like Pinterest and Houzz, the options are truly endless for what you can do! There’s no reason to go crazy expensive either… Simple is beautiful too. If you’re looking for a wow-factor, be creative with your arrangement, it will look great!!

Holiday Themed Centerpieces are so much fun.

For Christmas, try adding ornaments into a large dish. Throw in a little sparkle if you can! A little glitter by candle light will make your table shine.

When it comes to ‘dressing up’ your table think about these important points…

  1. Time of year, seasonal decor is easy to find so it won’t be a stressful endeavor to under take

  1. Type of gathering.  Is it formal? Casual? Family-friendly? Inside or Outside?  This will be vital when decide what to put on that table
  1. How crafty are you? There are tons of great ideas with glue guns, glitter and so much more but if you aren’t a crafty soul you could get stressed out, keep it simple, sometimes the simplest decor makes the most impact.
  1. Waste.  If you worry about waste think about edible centerpieces like fruit, candy, nuts or even beautiful artisan bread laid and displayed in a chic way.  If you opt for florals, think about how you could re-purpose the arrangements in your own home or give them away as a ‘prize’ like you often see at Weddings.


You can do so much with basics like ribbon, mason jars, flowers, paint, glitter, flowers, twigs, burlap, leaves, pumpkins, nuts, fruit, coffee beans, candles and other basics from around the home, the possibilities are really endless…


We love the look of a simple and seasonal centerpiece – celebrate the beauty that surrounds you everyday and embrace it!

0 comment
Share: